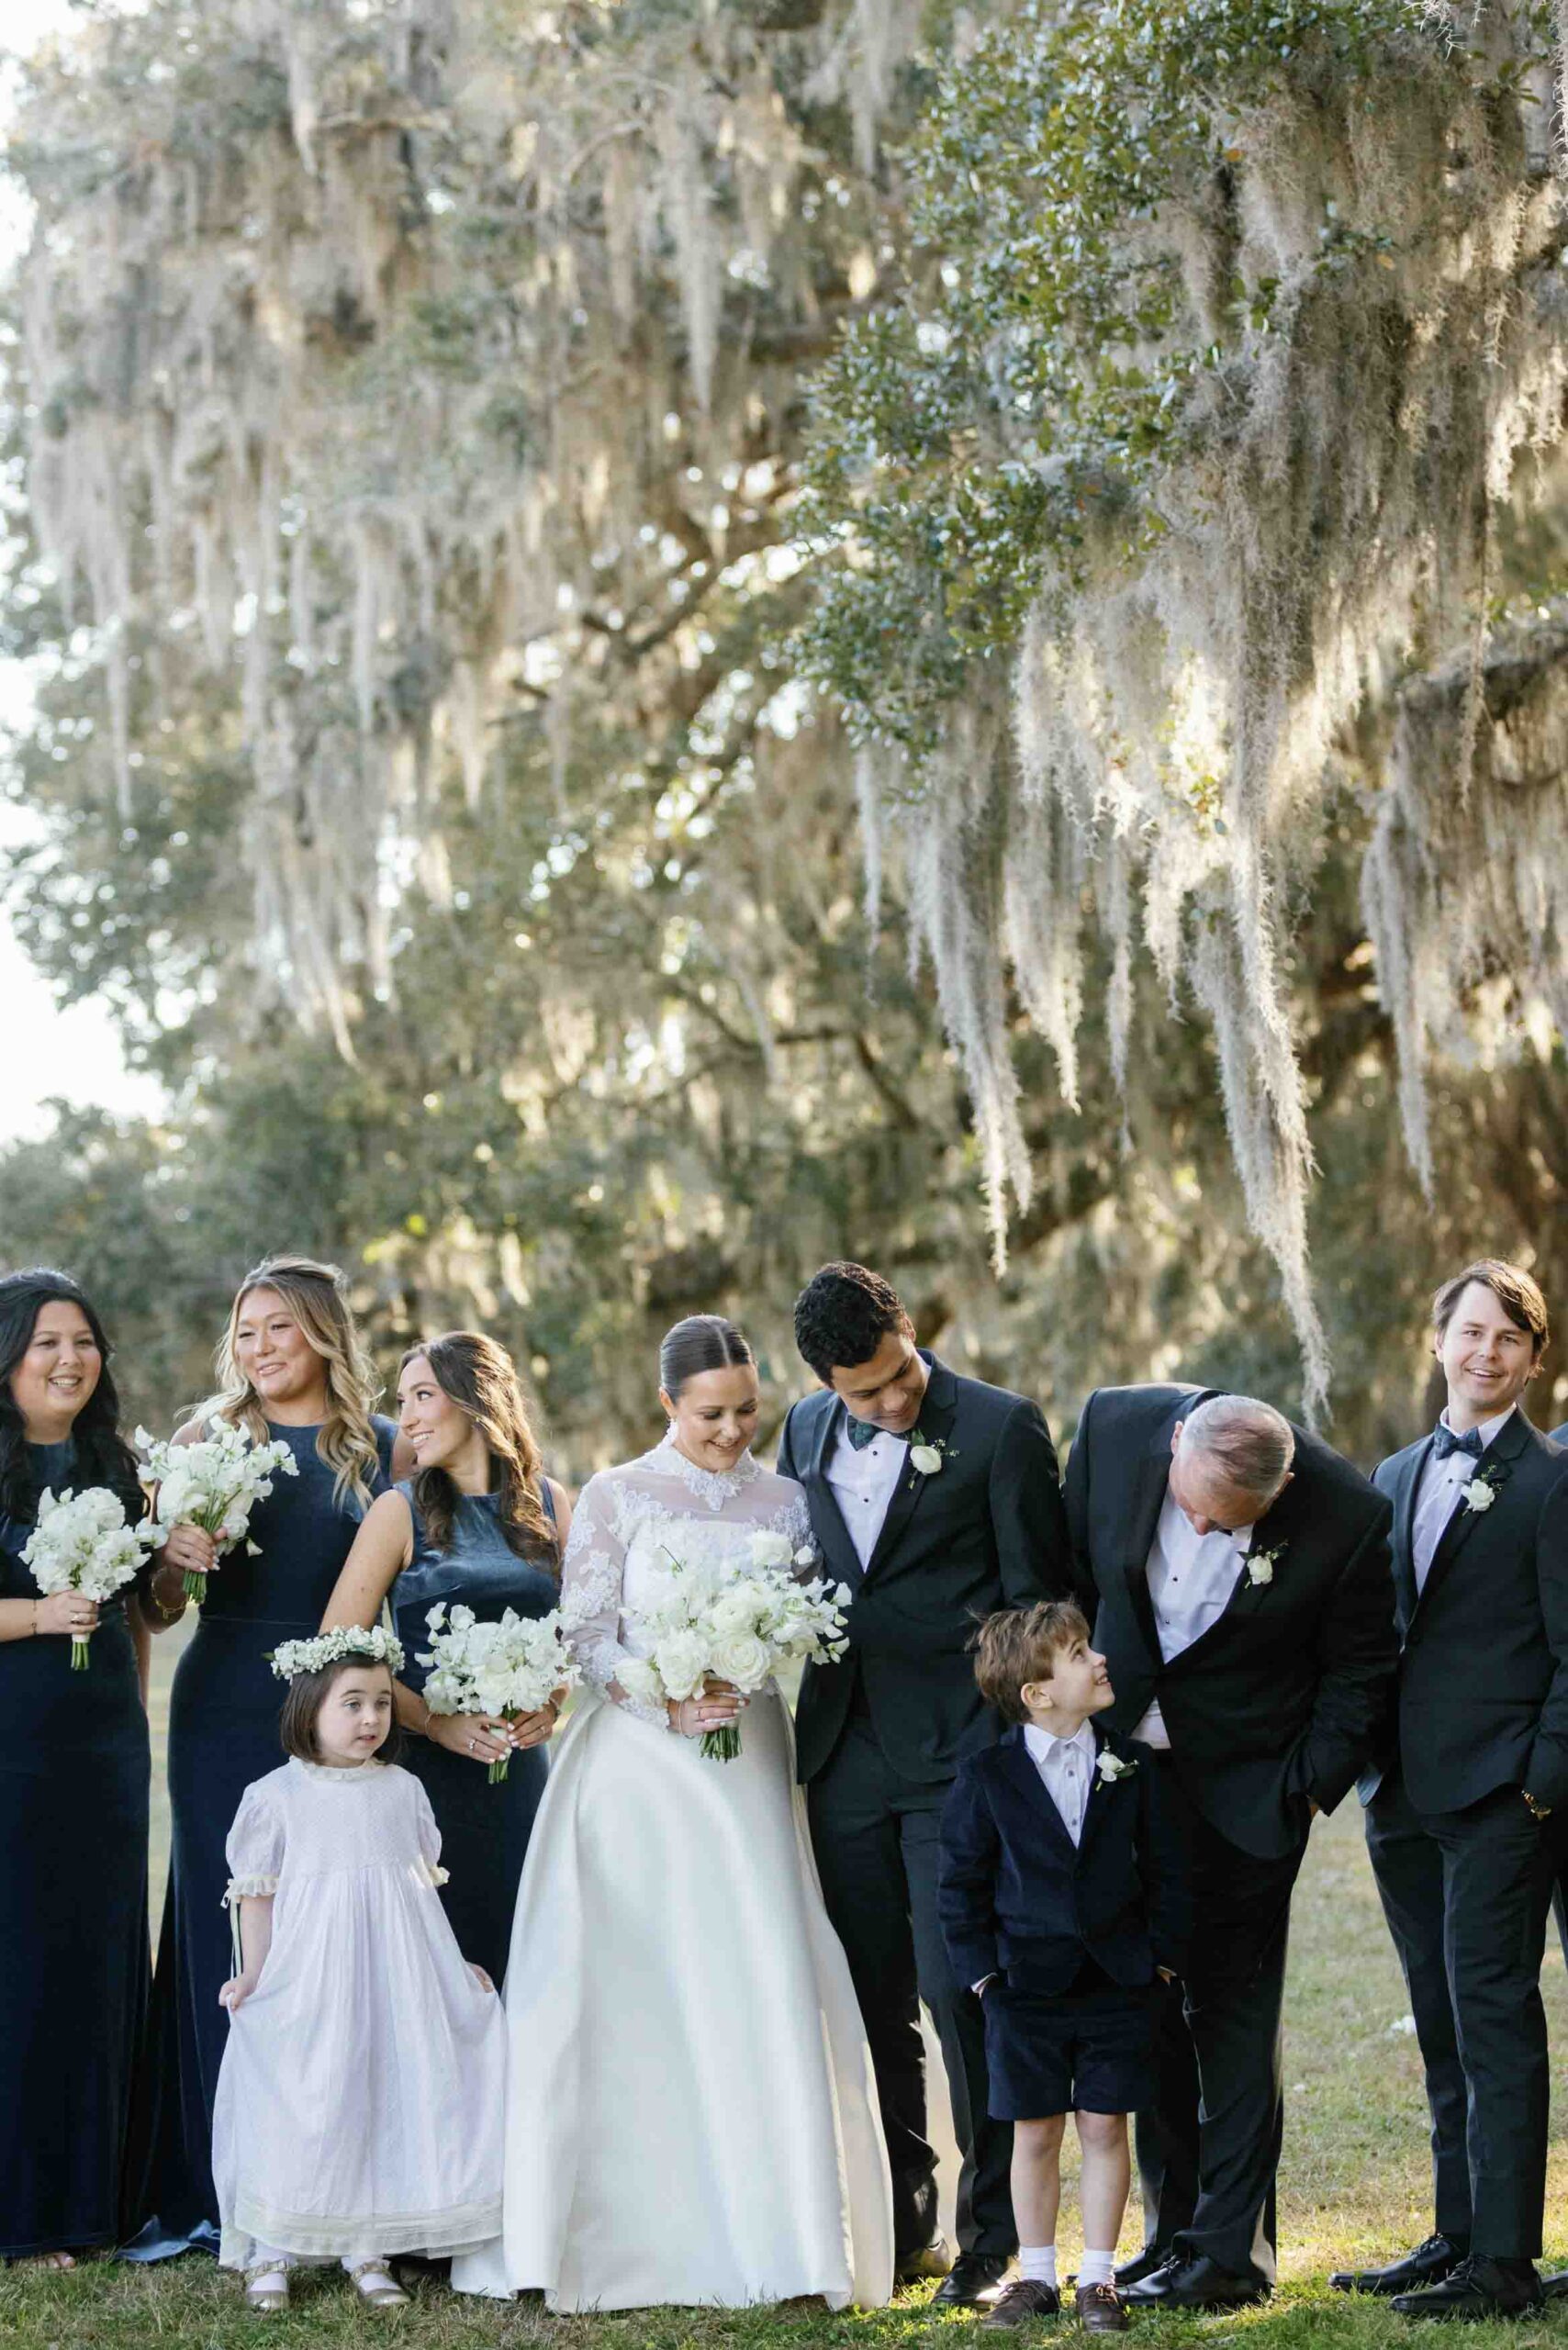
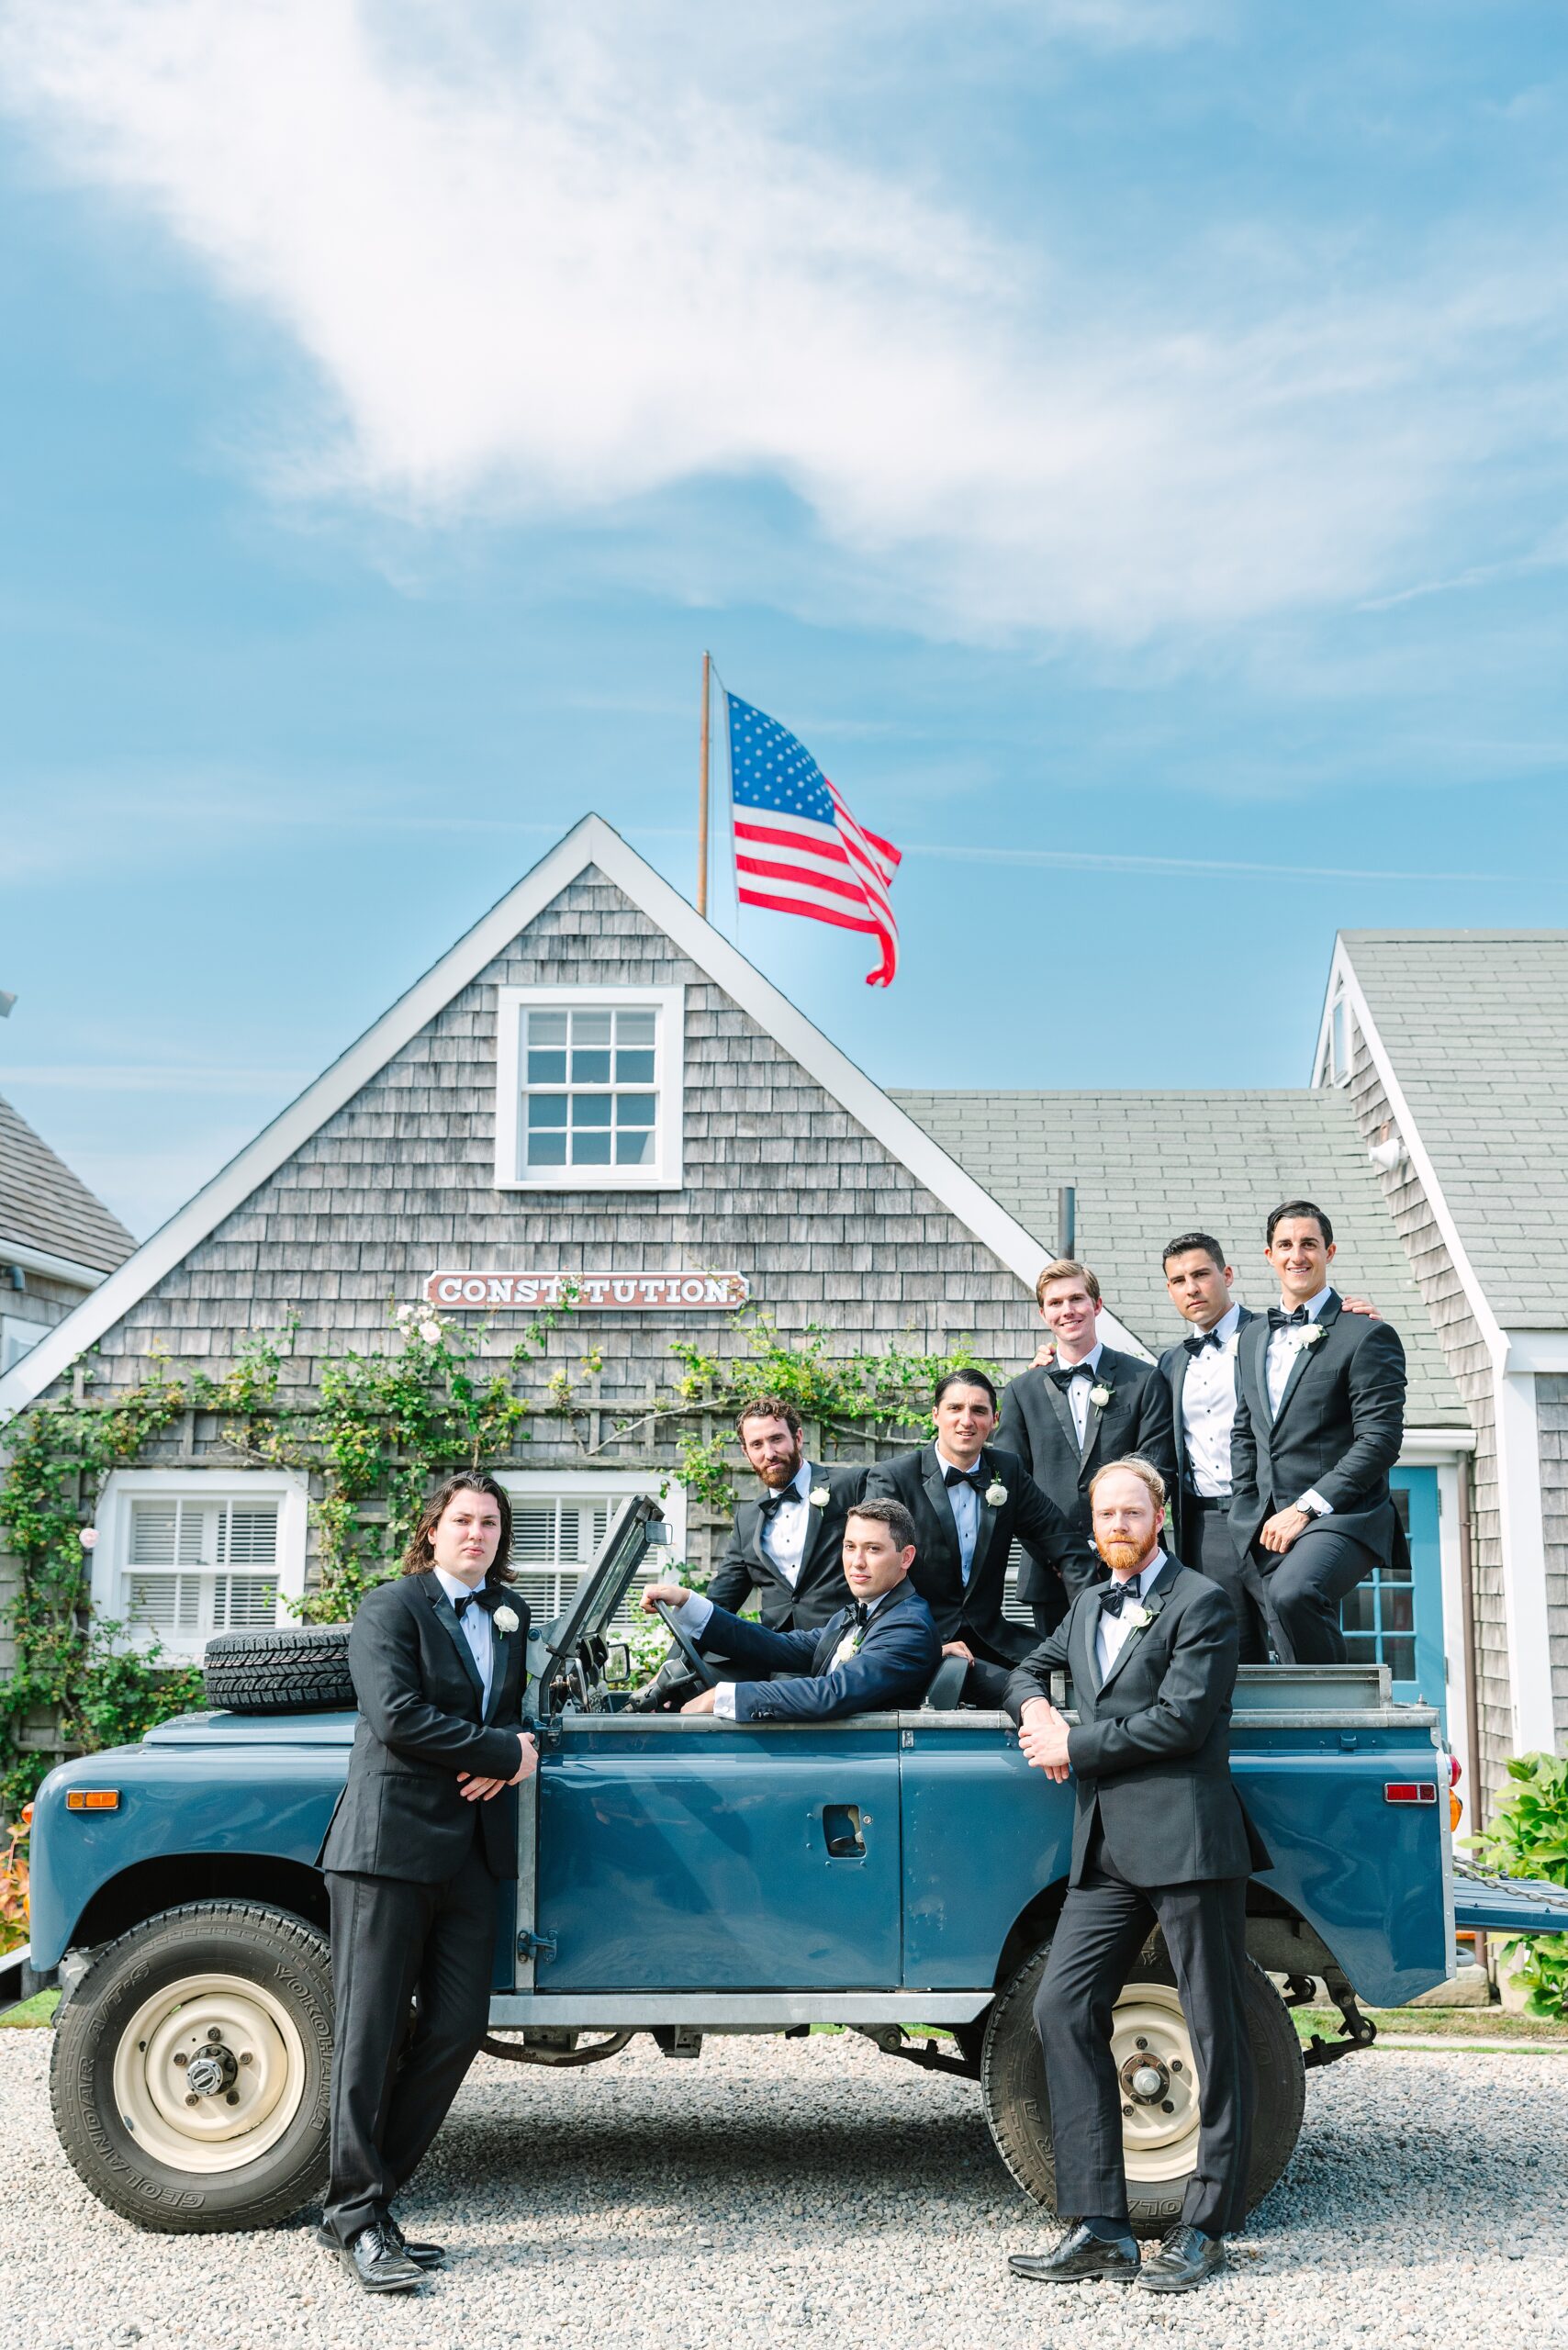
When I deliver a full wedding gallery to my clients, I want my images + the images that my second shooter took throughout the day to appear in sequential order. I want them to blend together, to tell the complete story of my clients’ wedding day from start to finish. Since we both are shooting from the moment we arrive on-site, my life is made just a little easier by being able to time-sync our cameras in Lightroom after the fact. I know some photographers will time-sync their cameras before they start shooting for the day, but for me, doing it afterwards is just as easy… and it’s just one less thing I have to worry about before I start shooting a wedding.
Time-syncing your cameras in Lightroom is super easy! I can’t take all of the credit, as I learned about this little trick from my friend Trevor and his fabulous video/article on F Stoppers back in 2013. However, this little trick has become part of my workflow for every wedding and it’s truly second nature to me now. So here goes…
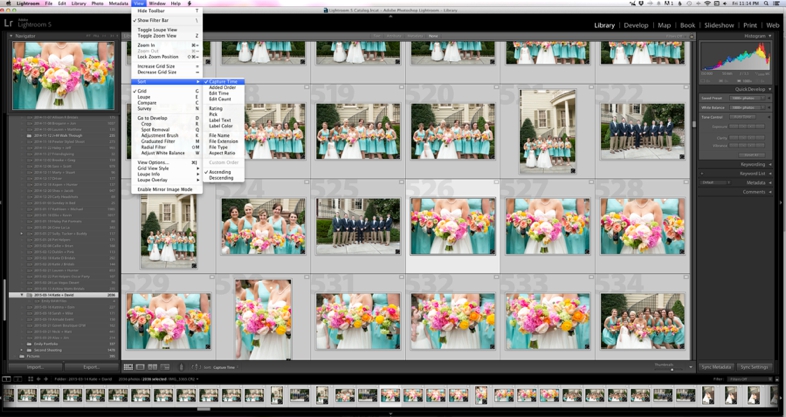
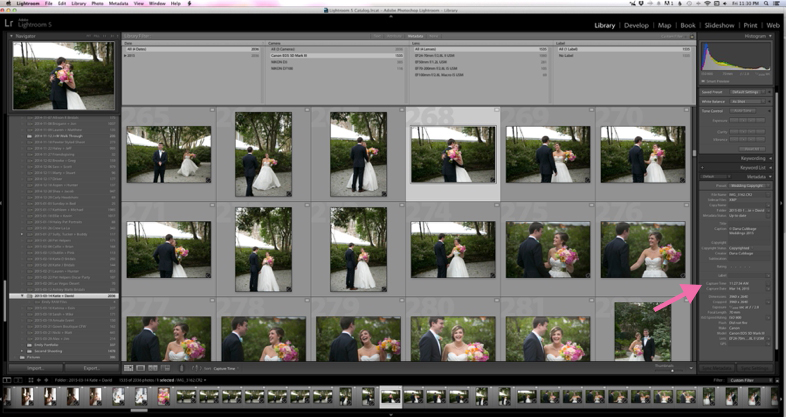
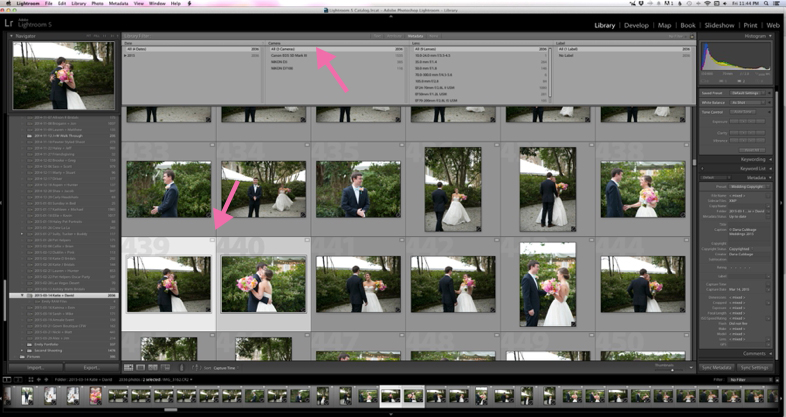
After you have uploaded all of your files + your second shooter’s files into Lightroom, you’ll want to go into the Library module by clicking on the “Library” menu item in the top right corner of Lightroom. Once you’re in Library mode, go to “Edit > Select All” and then “View > Sort > Capture Time” to ensure that all of your photos are in a good starting order.
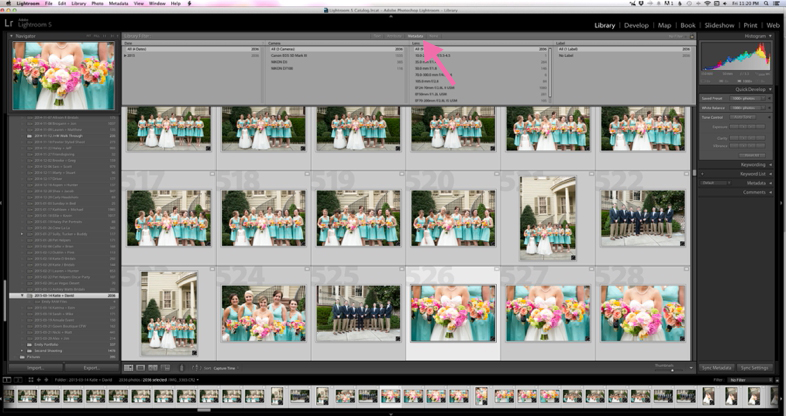
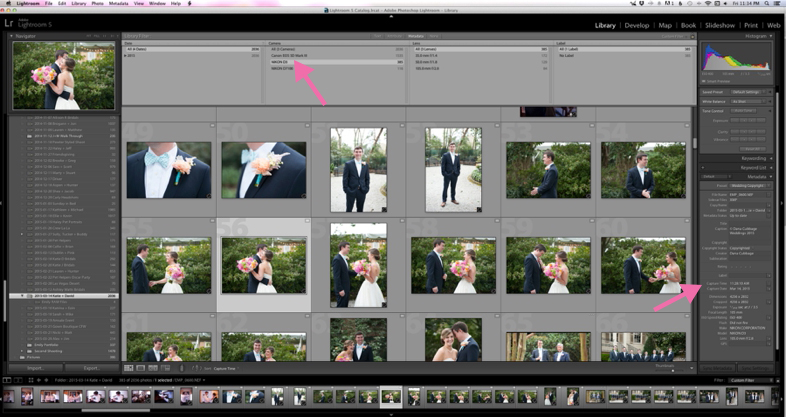
Next, click on the “Metadata” option in the Library Filter – which is the thin grey bar above all of your photos in this view. Here, you should see a filter for “Camera”. If you do not see this filter, simply click any existing filter and change it to “Camera” from the drop down menu.
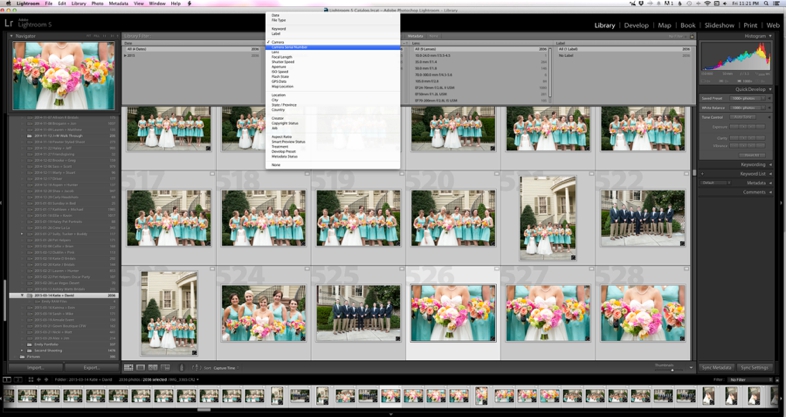
NOTE: If you and your second shooter use the same camera model (i.e. you both shoot with a Canon 5D Mark III), you will need to make this filter “Camera Serial Number”… not just “Camera”.
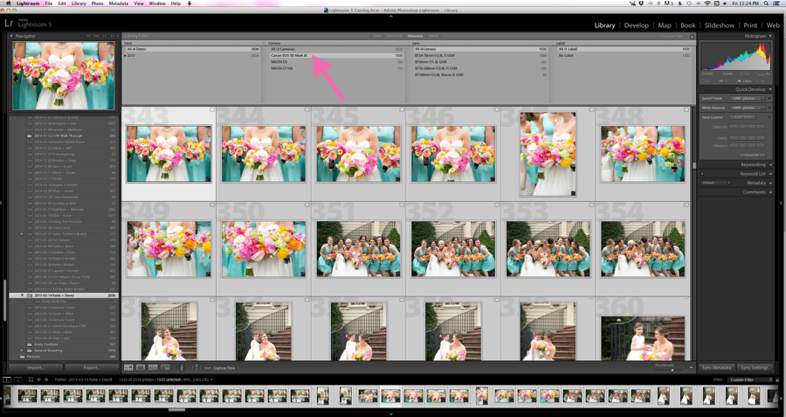
My personal preference is to sync my second shooter’s files to mine – but you can really do it either way! From here, I’ll choose my camera from the filter – and in this case, my camera is the Canon 5D Mark III. When I click on this filter, Lightroom is only showing me the files taken with my camera and hiding all of my second shooter’s files. The best way to sync files is to choose a photo or moment that you know that you + your second shooter shot at the exact same time. For me, it’s usually the First Kiss – but sometimes I need to find another major event or photo to sync to.
In this case, I chose their First Look because we didn’t get a great synced image during the First Kiss due to the setup of the ceremony. However, I knew that we both had a photo of them hugging for the first time at their First Look that I could use as a reference. So, while still only looking at my images, I found the photo I was looking for and clicked on it. On the right side of Lightroom, I chose the “Metadata” menu and could see that the time my camera recorded was 11:27:34AM. Either write that time down or commit it to memory for the next few seconds while you find the corresponding image taken by your second shooter.
To do this, go back up to the Library Filter (grey bar at the top of the photos) and select your second shooter’s camera or serial number. Next, scroll through their images and find the corresponding image that you want to sync from. After clicking on the image, I can see that my second shooter’s time was 11:28:10AM – about 36 seconds faster than my camera.
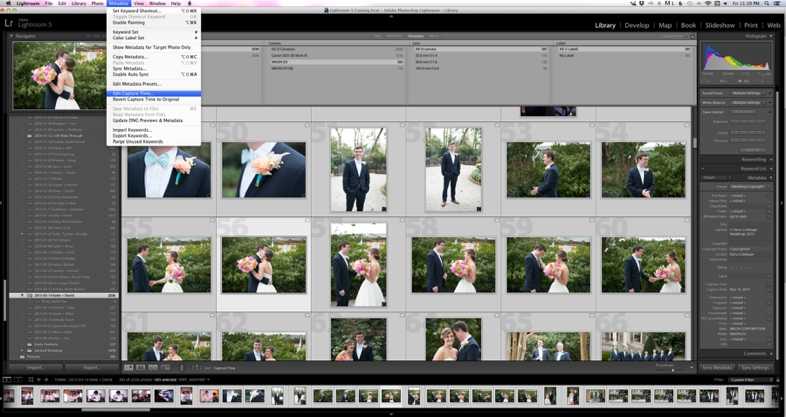
Now, not only do I need to change this image… but I need to shift ALL of my second shooters’ images to sync up with mine. Luckily, it’s super easy! After clicking on the specific image I’m syncing, I will go up to the menu and choose “Edit > Select All” while still filtering by only my second shooter’s camera/serial number. Just be careful, because you need to select that synced image first – THEN select all.
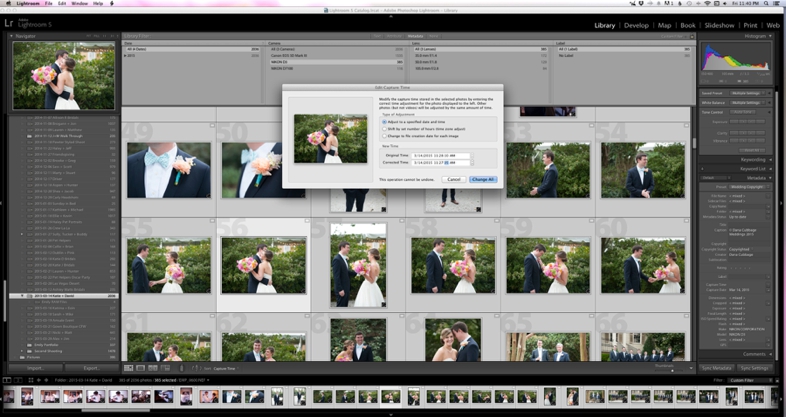
Next, go to “Metadata > Edit Capture Time” and you’ll see a little window pop up. The featured photo in the pop up should be the specific photo we’re syncing. Leave the “Type of Adjustment” set to “Adjust to a specified date and time”. Then, you’ll see the original time and a box for the corrected time. In this box, you’ll input the time you wrote down (or remembered) earlier from your files. I usually bump it back one second, just to be safe and so that my images appear first when they are all together chronologically. After you’ve entered your adjusted time, click “Change All” and every image selected will be updated to reflect a new time that will fall in line with your images!
To check, simply change the Library Filter at the top so that the camera/serial number is “All” and you can see how everything is now in chronological order throughout the day!
If, as you go through the gallery in Lightroom after syncing and you notice a few images that are off or if you didn’t really want or need that one second bumper, you can simply re-adjust the capture time on your files by following the steps above! If the sync doesn’t appear to have worked, be sure to double check your AM/PM designations, as well as the date. Those may need to be changed in the sync window as well. Once you do this a few times, it will be like second nature – I promise! It’s such a great trick and saves a lot of time + stress for me! Hope this helps someone out there!
With a well-worn passport in hand, and an affinity for a good cocktail, Dana works with fun-loving and kind-hearted clients around the globe.
meet DANA

When Katie first told me about her wedding day vision – a classic brunch wedding overlooking the water at the iconic Ocean Course on Kiawah Island – I knew it was going to be such a beautiful celebration. There really isn’t anything like a Kiawah Island wedding! A custom Modern Trousseau ball gown, topped with […]
I met up with Dawn + Joey in February for their beautiful engagement session here in Charleston. They brought their two beautiful pups, Willow + Cricket, along for part of the session… and boy, did they have a blast at Hampton Park?!? I am totally OBSESSED with the photos of them walking together (below) because […]
Audra + Rahul’s beautiful traditional Indian wedding in Charleston was definitely one for the books. I absolutely LOVE everything about South Asian/Indian weddings… the colors, the attire, the music, the food, the traditions, the rituals, the family element, the dancing. There really is nothing like it and if I could specialize in shooting only South […]
From the very first time I spoke with Martha Camille, I knew that her Boone Hall wedding was going to be EPIC. I also knew that she was going to be a dream client for me – and she absolutely was! I love all of my couples, but it’s so extra special when someone has […]
When Martha Camille told me that she wanted to recreate her mother’s studio bridal portraits, I’ll admit… I was a little hesitant. I’ve never done studio bridal portraits before and I was worried that I wouldn’t be able to bring her vision to life. As a creative, I love doing things that are outside of […]

2023 was definitely one of the best years yet for my business. I had the honor of working with so many fabulous couples, in so many fabulous locations… including Spain, Italy, and Hawaii! I feel extremely lucky that I was able to experience such a tremendous year of growth and travel. Here are some of […]
entries
popular

